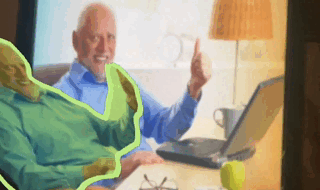
This tutorial guides you step by step through creating a HTML5 video filter that works on mobile and desktop. All of this made possible thanks to TensorFlow and Three JS.
We will use the following libraries:
TensorFlow JS: A machine learning library that can be used to train and deploy machine learning models.
Three JS: A JavaScript library that can be used to create interactive 3D graphics.
Getting all the dependencies
Tensorflow model can be quite large so we will rely on CDN delivery instead of hosting it in out project by adding the following in the <head> tag of our project:
<script src="https://cdn.jsdelivr.net/npm/@tensorflow/tfjs@1.2"></script>
<script src="https://cdn.jsdelivr.net/npm/@tensorflow-models/body-pix@2.0"></script>
<script src="https://cdn.jsdelivr.net/npm/@tensorflow-models/body-pix@2.0"></script>
As for Three.js we want to use some of the code shipped in the examples so we install the dependency using npm:
npm i threeFrom there we will be able to load the utilities we need directly from node_modules directory.
Loading the user camera
First we setup the camera so that we can get a stream of the user webcam:
function initVideoStream() {
  const videoElement = document.createElement('video');
  console.log('Initializing Video Stream...')
  return new Promise(ready => {
    navigator.mediaDevices.getUserMedia({ video: true, audio: false })
      .then(stream => {
        videoElement.srcObject = stream;
        videoElement.play();
        videoElement.addEventListener('playing', (event) => {
          canvasTexture.width = canvasMask.width = videoElement.width = videoElement.videoWidth;
          canvasTexture.height = canvasMask.height = videoElement.height = videoElement.videoHeight;
          ready(videoElement);
        });
      })
      .catch(err => {
        alert(`[Error occurred]: ${err}`);
      });
  })
}
Initialize Tensorflow with the BodyPix model
Next we load the BodyPix model:
function loadBodyPix() {
  console.log('Initializing BodyPix Library...')
  return new Promise(ready => {
    const options = {
      multiplier: 0.5,
      stride: 32,
      quantBytes: 4,
    }
    return bodyPix.load(options)
      .then(net => ready(net))
      .catch(err => console.log(err))
  });
}
Prepare the 3D scene
Finally we just need to setup the 3D scene.
For the sticker effect we create a small animated model in Blender. With just a single plane and a few bones we get the desired effect. Not worrying too much about the scale or animation speed as it can later be changed from Three.
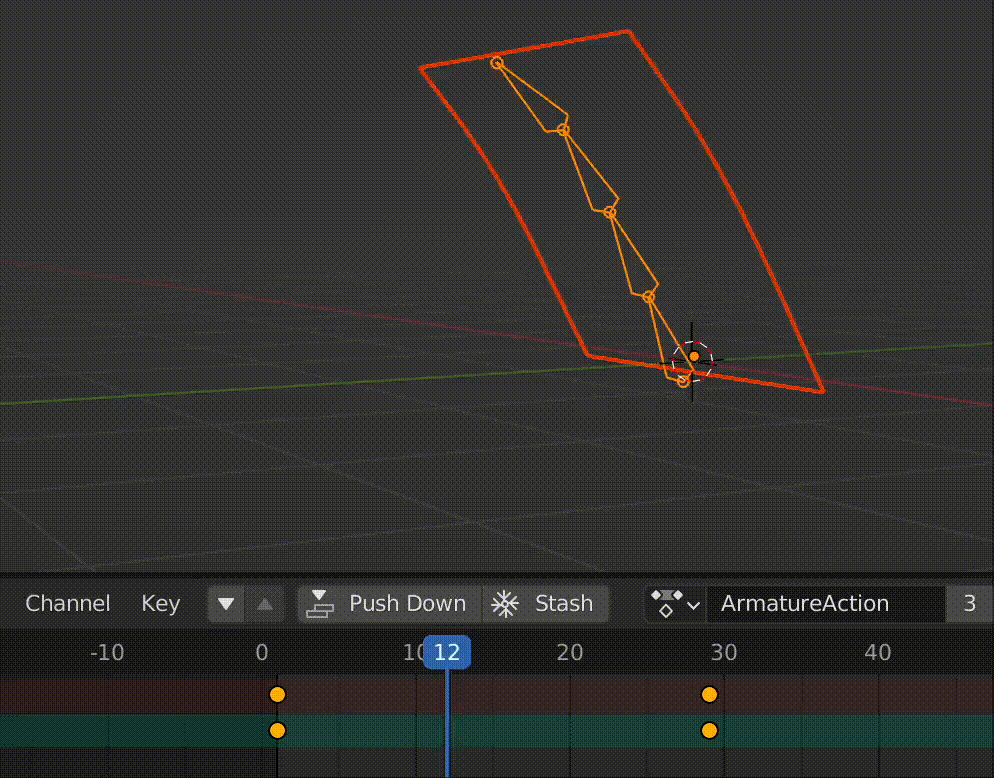
Once the 3D model is exported to GLTF, we need to use the appropriate Three loader to load the model in our small application as below:
function init3D() {
  console.log('Initializing Three...');

  clock = new THREE.Clock();
  counter = 0;
  sliceCounter = 0;
  width = videoElement.videoWidth;
  height = videoElement.videoHeight;
  maxSide = Math.max(width, height);
  camera = new THREE.OrthographicCamera(width / - 2, width / 2, height / 2, height / - 2, 1, 1000);
  camera.position.set(0, 0, 500);

  scene = new THREE.Scene();

  backgroundMesh = new THREE.Mesh(new THREE.PlaneGeometry(width, height), new THREE.MeshBasicMaterial({
    side: THREE.DoubleSide,
    map: new THREE.VideoTexture(videoElement)
  }));
  backgroundMesh.rotation.y = -Math.PI;
  backgroundMesh.position.set(0, 0, 110);
  scene.add(backgroundMesh);

  const loader = new GLTFLoader();
  loader.load('./../models/sticker.glb', function (gltf) {
    scene.add(gltf.scene);
    gltf.scene.traverse(function (child) {
      if (child.name === 'StickerPlaneMesh') {
        stickerTexture = new THREE.CanvasTexture(canvasTexture);
        stickerTexture.wrapT = stickerTexture.wrapS = THREE.RepeatWrapping;
        stickerTexture.repeat.x = - 1;
        stickerTexture.repeat.y = - 1;
        child.material = new THREE.MeshBasicMaterial({
          color: 0xffffff,
          transparent: true,
          side: THREE.DoubleSide,
          map: stickerTexture,
        });
        child.geometry.scale(width / 2, height / 2, 1);
        stickerMesh = child;
      } else
        if (child.name === 'StickerPlane') {
          child.position.set(0, -height * 0.5, 115)
        }
    });

    fallAction = gltf.animations[0];
    mixer = new THREE.AnimationMixer(gltf.scene);
    mixer.clipAction(fallAction).play();
    fallAction.clampWhenFinished = true;
    mixer.timeScale = 2;

  });


  renderer = new THREE.WebGLRenderer({ antialias: true, alpha: true });
  renderer.setClearColor(0x000000, 0);
  renderer.setPixelRatio(window.devicePixelRatio);
  renderer.setSize(width, height);
  container.appendChild(renderer.domElement);

  const controls = new OrbitControls(camera, renderer.domElement);
  controls.enablePan = false;
  controls.minDistance = 0.5;
  controls.maxDistance = 50000;
}
Generating the mask data
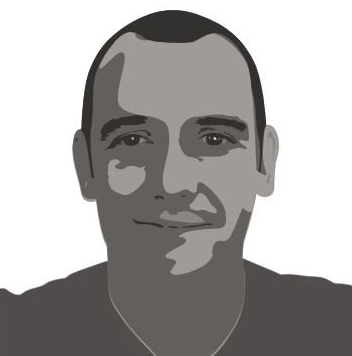
Before we can start using textures from the webcam to Three we need it to be processed by Tensorflow to determine the mask area and abstract the body shapes from the video stream:
async function drawMask() {
  const segmentation = await net.segmentPerson(videoElement);
  const coloredPartImage = bodyPix.toMask(segmentation);
  const opacity = 1;
  const flipHorizontal = false;
  const maskBlurAmount = 0;
  bodyPix.drawMask(
    canvasMask, videoElement, coloredPartImage, opacity, maskBlurAmount,
    flipHorizontal
  );
}
Cut a sticker slice
Now all the pieces are put together, we are just missing a function to cut a sticker slice every now and then.
This will get a webcam frame, pass it to tensorflow to abstract the body shape, then send this as a texture to Three/WebGL to render it in the 3D model animation.
function sliceOne(mesh) {
  drawMask(videoElement, net);
  const { width, height } = canvasTexture;
  const numPerSide = 1;
  const x = (sliceCounter % numPerSide) * (width / numPerSide);
  const y = (Math.floor(sliceCounter / numPerSide) % numPerSide) * (height / numPerSide);

  const imgData = contextMask.getImageData(0, 0, canvasMask.width, canvasMask.height);
  const data = imgData.data;
  for (let i4 = 0; i4 < data.length; i4 += 4) {
    const red = data[i4];
    const green = data[i4 + 1];
    const blue = data[i4 + 2];
    const alpha = data[i4 + 3];
    if (!red && !green && !blue) {
      data[i4 + 3] = 0;
    }
  }
  contextMask.putImageData(imgData, 0, 0);
  textureContext.clearRect(x, y, width / numPerSide, height / numPerSide);
  // Outline
  const borderSize = 7;
  textureContext.filter = `
    drop-shadow(${borderSize}px 0px 0 white)
    drop-shadow(-${borderSize}px 0px 0 white)
    drop-shadow(0px -${borderSize}px 0 white)
    drop-shadow(0px ${borderSize}px 0 white)
  `;
  textureContext.drawImage(canvasMask, x, y, width / numPerSide, height / numPerSide);
  if (stickerMesh) {
    stickerMesh.material.map.needsUpdate = true;
  }
}
Mashing it up all together
And that’s all it takes! We’re just missing a render loop function to sync it all together:
async function init() {
  videoElement = await initVideoStream();
  net = await loadBodyPix();
  init3D();
  animate();
}

function animate() {
  const delta = clock.getDelta();
  requestAnimationFrame(animate);
  counter += delta;
  if (counter > 0.5) {
    counter = 0;
    if (stickerMesh) {
      stickerMesh.material.color.setHSL(Math.random(), 0.75, 0.75);
    }
    mixer.clipAction(fallAction).reset();
    sliceOne()
  }
  if (mixer) mixer.update(delta);
  renderer.render(scene, camera);
}
Check out the final result demo here
Also find the full source code on github
And of course make sure to allow your webcam when opening the page :-)